Embroideries

Embroideries

Friday, May 14, 2010

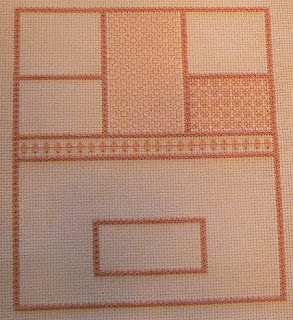
Quiltwork: Ruth Dilts, designer


Project: Quiltwork

Designer: Ruth Dilts

Type of needlework: Needlepoint

Photos: 2

Ruth Dilts' website:  http://www.ruthdiltsdesign.com/

Comments: This may have been my second project when I started stitching. Gosh, this seems like a lifetime ago, but it is not really. I guess, it just feels like it is.

This project had 4 different colorways to choose from and I choose the one that used the French Blue canvas.

The photo below shows the one with the Lavendula canvas. Other choices were Rose Blush and Sandstone canvases.

Finished size of the design is approximately 6 1/4 inch by 6 1/4 inch.


Thursday, May 13, 2010

Needlepoint Sampler Pillow: Ruth L. Hatten, designer


Project: Needlepoint Sampler Pillow

Designer: Ruth L. Hatten

Type of needlework: Needlepoint

Photo: 1

Comments:  When I decided to start stitching near the end of August of 1995, this is the very first project that I have ever done. This is what started me on this new path. I stopped stitching for a while as my day job was just too demanding and I was also taking piano lessons at the time. Years went by without stitching but I finally came back to it because I had really enjoyed stitching back then and I guess the rest is history (big grin).

For this project all that was needed was a piece of canvas, some Paternayan Persian wool and a needle. The stitches I learned with this little pillow are: Spider Web, Continental, Cherckerboard, Reverse Smyrna, Straight Gobelin, Leviathan, Slanting Gobelin, Rice, Smyrna, Greek, Reverse Tent and Basketweave. I even did the finishing on this little pillow.

Wednesday, May 12, 2010

Little Crazy Quilting Sachet Pillow: A gift received


Project: Little Crazy Quilting Sachet Pillow

Designer: A gift from my friend Terry

Type of needlework: Crazy Quilting

Photos: 3

Comments: This is a little crazy quilting sachet pillow that my friend Terry made for me some years ago. We were both doing crazy quilting at the time and she surprised me with this little sachet pillow as she knew that I had already started a collection of little pillows.

Terry has added on the back of the little pillow a special little scented pad hidden under the lady's head, which she first dyed using different color dyes and then appliqued on the back of the pillow (photo below)

(View of lady's head on the back of the sachet pillow)

(Closeup showing how the little scented pad has been hidden under)

Tuesday, May 11, 2010

Plaid and Blackwork Checkbook Cover: Marjorie B. Berleur, designer


Project: Plaid and Blackwork Checkbook cover

Designer: Marjorie b. Berleur

Type of needlework: Needlepoint and Blackwork

Photos: 14

Comments: I was looking for something that I would be proud to be my checkbook in instead of those awful plastic ones that the banks give you whenever you open a checking account. One of my friend came to my rescue with this lovely design. It had two elements that I found interesting together, plaid and blackwork, so there was not a moment hesitation for me to decide that I wanted to stitch this one. I may make another one. The only part of this project I found a bit difficult was when I was doing the first half of the plaid. Somehow it had a dizzying effect on me. It may do the same thing on you when you look at one photo in particular and then again, perhaps it won't.

The photo above shows you the front part of the finished checkbook. The photo just below this text shows you the back.

UPDATE: Tennessee (Nashville) flooding update: http://www.tennessean.com/


(Photo showing the back of the checkbook cover)
(Blackwork stitches)


(Photo showing my checkbook cover in its plastic cover)


(Photo showing the front outline)


(Photo showing the Smyrna Star outline)

(Photo showing two Blackwork section completed)

(A view of what has been stitched so far)

(Photo showing all the Blackwork sections done)

(Another view showing all the Blackwork completed
with the front still to be stitched)

(This is my dizzying photo with only the first part of the plaid done)

(Overall view of the first half of plaid done with Blackwork completed)

(This photo shows the left side plaid completed and the right side waiting to be done)

(Plaid completed)

(Photo showing my initials and the finishing border all around it)

This checkbook cover was made with #16 count Aida and using #12 Perle Cotton for the  main color and DMC floss to match the main color and 3 colors of floss to complete the plaid.

This project could also work for a two year planner instead of a checkbook. 

Monday, May 10, 2010

Heirloom Purse Collection: Susan Clarke, designer


Project: Heirloom Purse Collection
(Kit #RP-29)

Designer: Susan Clarke

Type of needlework: Beading and silk ribbon

Photos: 2


Photos of other Heirloom purses here.

Comments: This was a kit that I purchased years ago as I liked the look of those little purses in which you could for example put a key inside and/or a few dollar bills in case of need. It is too small to put anything the size of a credit card though.

I have a dress which is just perfect for this little heirloom purse which you put around your neck. It is almost as if they were made for each others, so I often use it. when I don't, I just hang it on one of my wall in my stitching room.


Sunday, May 9, 2010

Flower Diamonds: Terry Dryden, designer


Project: Flower Diamonds
(Pilot class)

Designer: Terry Dryden

Type of needlework: Needlepoint with Silk ribbon embroidery

Photos: 11

Terry Dryden's website: http://www.terrydryden.com/

Terry Dryden Flower Diamonds class: http://www.terrydryden.com/flower-diamonds-two-day-wkshp/

Comments: This was my very first pilot class project, which I did as a "ghost stitcher", actually it is my one and only pilot class (smiling). Terry had an actual pilot class for this project as well as a few ghost stitchers and our role was to try to find any possible mistakes in order to make things smoother for her 2009 ANG Seminar that was to be held in Milwaukee on August 31st and September 1st as a 2-day class.

I received over 30 different threads and 6 different assorted beads that I could choose from to stitch that project. I must say that many of those threads I had never used before so that was quite exciting. One of Terry's goal was to entice us in making changes, which I did to some extent.

On the very first photo above I am showing you a couple of those threads, but Jan from Thread Medley who also was a ghost stitcher has put a photo on her blog showing everything that she received in our kit, so you may want to pay her a little visit.

Terry Dryden had Flower Diamonds finished by Marlene Custom Pillows. You can see Terry Dryden's lovely neckroll pillow on her website here.

The design size of Flower Diamonds is 6 inches by 15 inches and the stretcher bars used were 12 inches by 20 inches and it took me approximately 3 weeks of stitching to complete this project. Since I had a deadline on this, I stitched exclusively on that project. Flower Diamonds has 3 panels which are yellow, lavender and orchid. Most of the design is the same in each panel except for colors and the central flowers.

My experience as a ghost stitcher with this project has been a fun one and I would not mind at all doing it again if the occasion ever presents itself in the future.

(Photo showing the Yellow panel)

(Photo showing the Orchid panel)

(Photo showing the Lavender panel)

(Lavender panel)

(Orchid panel)

(Yellow panel)

(Orchid panel)


(Lavender panel)

(Yellow panel)

Now, all that remains to do is to order all that I will need to finish Flower Diamonds as a neckroll pillow. I already have found some patterns that I really like, found some fabric that would look good with these colors, so I really need to take the necessary time to do the finishing on this one.

Saturday, May 8, 2010

She Stoops to Conquer: Anne Stradal, designer


Project: She Stoops to Conquer
(painted canvas)

Designer: Anne Stradal of ABS Designs

Type of needlework: Needlepoint

Photos: 3


Comments: This is a fun design that Anne created for us. So many of us can say that we have found ourselves in such position, looking down at our scale to tell us how we are doing weightwise.

When I initially saw this design, it made me smiled and I wanted to stitch it. If you go on Anne's website you will see that I have changed the colors I used for mine and changed a few details in the stitching itself.

The framing of the piece, I wanted to do myself so I have made myself a fabric frame following the instructions I had read in the Embroidery Canada, Spring 2007 magazine from an article called "It's time to display" written by Susan Donn.

I have decided against making any cording around the framed piece as I felt it just did not need it BUT I am now reconsidering perhaps adding a piece of cording around the dark fabric frame on the outside of the frame. I need to check this out and try a few options to see how that would look like. With such finishing as I have done on this piece, it is really never too late to add something to it at a later date.

(Upper part of the design stitched)

(Fabric frame for the piece)

Friday, May 7, 2010

Here's My Heart Scissors Sheath: Janet R. Stauffacher, designer


Project: Here's My Heart Scissors Sheath

Designer: Janet R. Stauffacher

Type of needlework: Silk ribbon embroidery and beading

Photos: 2


Comments: I have purchased that kit a while back from Vintage Vogue and some time ago I decided it was time for me to tackle this project.

I must say that the instruction pages that came with that kit were extremely well done with plenty of photos. I was really impressed. Janet Stauffacher really makes it easy for us to make this project and I enjoyed myself.

The kit came with a little pair of French scissors which will be great to have around. You can never have too many pairs of scissors.

I have included a photo (above) that shows the little scissors attached to its sheath through a beaded loop and here below when the scissors are tucked in the sheath.

The three-bead edge that goes around the sheath can also be seen here though Janet explains it very nicely in her instructions.

SPECIAL NOTE: Some of you already know this, but most of you do not since I do not normally talk much about myself since I want my blog to be about stitching only.

I live in the state of Tennessee and it feels like almost the whole state has been flooded and most of us have been affected by this catastrophy one way or another. My house has not been flooded, but we had other problems like almost everyone else in this state. It has been and still is pretty awful and it will take a long time for the state to be back to what it used to be before this happened and I don't even want to contemplate how much it will cost.

Where I live, we had approximately 14 to 15 inches of rain in a 36 hour period, which is an awful lot of rain. For a few days we did not see our regular mailman and when we saw him again he told us that he had to take 2 days off because his basement had been flooded. Nashville and so many other places in Tennessee have been heavily hit, some places worst than others. We have to use water only for personal hygiene and cooking as so many water treatment facilities have been under water and needs to be repaired and I have no idea how long this will take. Nashville has one operating water treatment out of two and we almost lost it. That would have been very very bad if we had lost that second one. Similar scenarios for other towns. Many people have died and authorities are still looking for others who have not been seen since the rain started on May 1st.

I could fill pages and pages of all the bad things that have happened in Tennessee, but you can read more about it and also see photos in our local newspaper which is called The Tennessean.


Sunday, May 2, 2010

Kaleidoscope Coasters: Brenda Day, designer


Project: Kaleidoscope Coasters

Designer: Brenda Day

Type of needlework: Bargello

Photos: 4

Comments: I just love this book (information below) as it has so many interesting projects in it.

On pages 59 through 63, there are four different kaleidoscope coasters to choose from. I intend to stitch all four of them but so far have only done 2, models B and C.

The threads listed for doing the projects are Anchor stranded cotton ones, so they are very easy to find or they could be substituted for the DMC ones if you have a sustitution table or you may just choose your own color combinations.

I have ordered from England some plastic coasters for them, which are Fabric Flair craft coasters. They can also be seen on UK Amazon here. You can also find other plastic coasters in the USA that are very similar and would also do the job nicely.

The first photo above shows the two Kaleidoscope coasters (models B and C)  in their respective Fabric Flair craft coasters.

(Coaster B)

(Coaster C)

(Projects have been selected out of this book called
Bargello: A Fresh Approach to Florentine Embroidery
by Brenda Day)

Saturday, May 1, 2010

Letter "M"


Project: Letter "M"

Designer: Iron-On transfer taken from an "American School of Needlework" book

Type of needlework: Silk ribbon embroidery

Photo: 1

Comments: This is my very first silk ribbon embroidery project. As some of you may know, this letter is not part of my main initials as they are "P" and "P". How boring is that?

Anyway, I was told that there was more learning potential with an initial like "M", so I went with what seems at the time like a very logical recommendation and stitched an "M" for my first silk ribbon embroidery project. Now, when anyone asks me what the "M" represents, I just say that it stands for "Mine" and leave it at that (grinning).