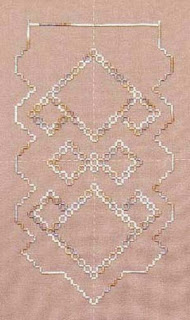
Embroideries

Embroideries

Tuesday, December 28, 2010

Christmas ornament received from my good friend Rinda

(Photo of Christmas ornament made by Rinda)


Project: Christmas ornament
(2010)

Designer: Margaret Bendig

Type of needlework: Needlepoint

Photos: 2

Comments: My good friend Rinda made this lovely Christmas ornament for me using different red and gold threads and she then finished it with lots and lots of gold and red beads.

I really need to also start finishing some of mine with beads as they really make a beautiful finishing. Seeing one upclose like this one will certainly motivate me in doing so in the future. I just got so used to making a decorative cord for them that I just don't stop and think about beads for some of my finishings. I think that this is about to change.

I rarely post photos on my blog of the back of an ornament, but I thought of making an exception here as I really love the fabric that Rinda used for hers. I think it is just perfect.

I also received some yummy biscottis with my Christmas ornament that Rinda made herself as she loves to cook. I know these biscottis will be wonderful as she also sent me some last year and I can tell you that they did not last too long as both my husband and I found them absolutely delicious. I only had eaten some store bought ones before which did not hold a candle to the ones Rinda made. I am now a biscotti convert (smiling)


(Photo showing the fabric on the back of Rinda's ornament)
Monday, December 27, 2010

Spiderweb Bookmark


(Completed bookmark sitting on Inspiration Magazine, issue 50)


Project: Spiderweb bookmark

Designer: Something I created for a friend of mine

Type of Needlework: Embroidery

Photos: 2

Comments: I made this spiderweb bookmark for a good friend of mine as she is just like me, a big reader.

I have used a spiderweb drawing that I found somewhere (can't remember where right now), but we can find such drawing just about everywhere so it does not matter too much where I found mine. I then added a thread hanging down and stitched a little spider there, so she better watch out when she is engrossed  in her reading, forgetting the world around her, as an uninvited visitor may soon be dropping by (grinning).

I have used the shape for the bookmark from one of my Australian Inspiration magazine, issue 50. The instructions for assembling the bookmark are very clear and easy to do.


(Photo showing the drawing all stitched)

Sunday, December 26, 2010

Pumpkin Scissor Fob


Project: Pumpkin Scissor Fob

Designer: Something I put together for a friend

Type of needlework: Embroidery

Photos: 3

Where I often get my drawings: Cathy Creatif

Comments: If you have read yesterday's post about the little cat scissor fob, the process with this very smiling pumpkin was exactly the same. Found the drawing on Cathy Creatif here and proceeded as I did for the little cat.

What made me decide for this topic and not something else was bifold. Firstly, we both love Halloween stuff so why not select something with that theme and secondly I remembered her making a watercolour painting a while back with lots of pumpkins having different facial expressions and I remember her saying she had fun painting them and of course one could not help but smile while looking at them. With little projects like these, I feel that I can be as silly as I feel at the moment.

I wanted these little scissor fobs in addition to being very useful to be fun too for her.


Photo showing the pumpkin drawing in a diamond shape square


(Photo showing the two little scissor fobs made for a friend of mine)

Saturday, December 25, 2010

Cat Scissor Fob that I made for a friend

Project: Cat Scissor Fob

Designer: Something that I put together for a friend

Type of needlework: Embroidery

Wonderful website when looking for free patterns: Cathy Creatif 

Photos: 2

Comments: One of my friends wanted a couple of scissor fobs for her little scissors so that she would be able to spot them easily whenever she misplaced them, which was and is still often, so I put my thinking cap and thought about the things that meant something to her and that would put a smile on her face. She loves cats and through the years had many, so I thought this was a good choice for her.

Once I had decided on the subject matter, I needed a design that would fit in such a little space. A whole cat would have been way too big for this little project so I found this lovely cat on Cathy Creatif website,  and just used the head for my little scissor fob.

 I traced a square on some silk dupioni fabric and then traced the design on the fabric (diamond shape), stitched the little cat and put the back fabric together with the front, put a little amount of stuffing inside, made a little cord and attached it around my diamond shape scissor fob and then made a little tassel to it for further embellishment and I was done.

Tomorrow I will show you the second one I made for  her.

Friday, December 24, 2010

Florentine Fancywork: Toni McKelley, designer


UPDATE 04/22/2011:
Just added a photo showing Florentine Fancywork framed.

===========================


(Florentine Fancywork all stitched)


Designer: Toni McKelley

Type of needlework: Bargello

Photos: 2

Comments: I have been wanting to stitch this piece for a while now as I love both the design and the colors used in Florentine Fancywork. I do think that this has been my most colorful project so far as I tend to go for more subdued colors in general, but somehow these colors are very pleasant to me.

A few notes about this piece.

The colors in the photo provided on the ANG website (see photo below) seem to me much lighter than mine and I am using exactly the colors listed on the material list so you may get a more accurate idea of the colors of this piece with the photo above. I am actually happy about that as they are, to me anyway, much richer looking. My thoughts on this are that this is just a photo color thing. I should know as sometimes with some projects I have an absolutely terrible time taking good photos and with others it is a breeze, so go figure.

A second point that I need to be making at this juncture is that the master graph is a little different than what we can see on the ANG photo, not by much, just a few details like on the left and right side flower border, I have 9 flowers and on the original piece there is only 8 and some of the flowers are separated by some Dark Periwinkle thread. I could have gone either way with this, but have decided to just go with the actual master graph. I just don't feel like complicating my life in trying to change anything as either way suits me just fine.

Another point is that there are a few errors, at least on my own instructions which a friend let me borrow because I wanted to stitch this project but like others I only needed the instructions, not the class itself. One of the thread listed on the material list is Rainbow Gallery, Mandarin Floss, M843 Straw, but when you actually start using that color, you will find out that it should have been M842 instead which is a lighter shade of the same color, but you want the correct shade as the one listed on the material list is way too dark. Another thing, I would strongly advise anyone stitching this piece is to purchase 2 cards of the Rainbow Gallery, Splendor, S864, Dark Periwinkle, as one would have been insufficient for me.

There are a few mistakes on the charts, but they are mainly on the individual charts for specific sections. I have found that if I checked the master charts with the individual sectional charts, these little mistakes became evident and I could avoid them. Another point to make is that if you are like me, you are used to doing bargello projects that are rather simpler. What I mean by that is that once you have understood the progression of the pattern it more or less remains the same for the entire section, but this project is way different as you have many sections that meets each others and thus have lots of compensations, so if I had to give one word of advise, do not take anything for granted and check, check and check before assuming that if you have done one row one way that the next row will be the same. It may not be the case.

 I have enjoyed this piece tremendously and am quite happy to have had the opportunity to stitch it. It has been a great experience.

Below here is the photograph of the piece that is on the ANG website.


(Photo as shown on the ANG website)

Sunday, December 19, 2010

Christmas 2010 Slideshow: Christmas projects


Christmas time has always been very special for me ever since I can remember. When I became a stitcher, instead of just buying Christmas decorations, I could then actually make some myself and I have had a ball doing just that ever since.

Since many of those Christmas projects have ended up in new homes, I thought it would be nice for me, and hopefully for all of you too, to take a few moments and have another quick look at them.

I hope you enjoy viewing them as much as I will.

I would also like to take this opportunity to wish everyone who visit my blog some VERY HAPPY HOLIDAYS.

Pierrette =^..^=


Saturday, December 18, 2010

A Christmas poem for all of us, exhausted stitchers


"The Morning After" Anne Stradal, designer


POEM


'Twas the night before Christmas, and, oh, I was weary.

My stitching unfinished, my eyes getting bleary.

The stockings weren't finished, the chimney was bare.

And I knew that morning soon would be there.


My children and husband were tucked in their beds,

But visions of backstitches ran through my head.

I'd stitched ornaments and presents and gifts by the ton,

And now, I was finally, almost, almost done.


As I poised my needle for one more backstitch,

I heard something outside that made my hand twitch.

I jumped up from my stitching, and flew to the door,

Pressed my eye to the peephole, tip-toed off the floor.


My stitching forgotten, I peered into the night.

When suddenly, I got a terrible fright.

On my porch appeared Santa, holding his sack.

He knocked softly, and I took a giant step back.


I unlocked the deadbolt, and let Santa in,

He entered and gave a mischievous grin.

"Hope you don't mind if I come in the door?"

"Coming down the chimney can be quite a chore."


He said, "You're up late. Still working I see."

"Do you know how tired you're going to be?"

"I know, Santa," I said, with a sigh,

"But I'm still backstitching the stars in the sky,"


"And the fields on that stocking look blobby you know,

I need to backstitch the drifts in the snow.

I've been stitching and stitching and stitching, no rest.

I just tried to finish stitching too much, I guess."


"I know what you mean," he said with a smile.

"This is my busiest time of the year, by a mile."

He stooped down by the tree, and he opened his sack,

And began to pull presents out of his pack.


"I've got some things here I think you might like,

An oak stitching frame, and a brand new Ott-Light.

A bundle of floss, and a great big mat cutter,"

I smiled and felt my heart go a-flutter.


He put down gifts for us all, then he waved his right hand.

"Go to bed," he said, glancing at my floor stand.

He gave me a wink, and stepped out the door.

I just stood there a moment, glued to the floor.


After he'd left, I turned back to my chair,

Picked up the stockings, and started to stare.

The backstitching was done! The stars lit the sky!

And on my son's stocking angels sung on high.


I ran to thank Santa for this final gift,

And watched as his sleigh started to lift.

I heard him exclaim as he pulled out of sight,

"Merry stitching to all, and to all a good night!"


Author Unknown

Saturday, December 11, 2010

Christmas ornaments received from my best friend Terry for my Christmas tree

(Santa's boots)


Designer: Pinflair kits

Type of needlework: Craft and Ribbonwork

Photos: 3

Pinflair website: http://pinflair.co.uk/

Comments: Terry and I exchange gifts mainly for two very special occasions during the year, Christmas and our birthdays. We have now been doing that for years. Gifts vary considerably from year to year depending on our circunstances, but no matter what we end up giving each other, it is always wonderful and very appreciated by both of us. We seem to have the same tastes ao we can be pretty sure that if I like something, chances are great that Terry will also like it. This makes things much easier for both of us to give each other presents that will be treasured for the rest of our lives.

This year, she was not really into stitching much so she purchased these lovely kits and made me five lovely ornaments for Christmas. I am absolutely thrilled with them and after I finish writing this post I will rush down and hang them on my Christmas tree.

I have been thinking about taking lots of close-up photographs of all my Christmas ornaments that are decorating my tree this year and making a little slide-show with them. My interests are very diverse, so having a Christmas theme just does not work for me, so it is a bit of this and a bit of that and I just love it.


(Tartan pinecones)

I love pinecones and I think it is such a wonderful ideas to make them with ribbons.
It will look great in my Christmas tree.


(Stardust)

I was looking at Pinflair website which is a British site and they have such an abondance of kits
that it must have been hard for  my friend to choose the ones she has selected this year.

A funny thing just happened, while I am writing this, my husband just came into my stitching room and he was asking me if they have lots of other kits there and I showed him all that they have on their website and he showed me all those that he liked (big grin). Gosh, someone could start a tradition with them as there are so many to choose from.

................. and to think that I now have Santa's boots (smiling)

Saturday, December 4, 2010

Ladies - A Christmas ornament: Helen Gibb, designer


Project: Ladies - a Christmas ornament

Designer: Helen Gibb

Type of needlework: Ribbon work

Photo: 1

Helen's website: http://www.helengibb.com/

Comments: I thought it would be fun to make a different kind of Christmas ornament that I normally do, that does not actually involve much stitching at all, mostly at this time of the year if you are running behind as I am.

This little ornament came as a kit, so no hunting for supplies. I can also see lots of possibilities for  me to create others similar and at the same time different to this one. I will need of course some fabric print, which is something that I have since I have done some crazy quilting in the past and thinking of going back to it as I love to do a bit of this and a bit of that. It makes life more interesting, I find (smiling)

Saturday, November 27, 2010

Five Flower Sampler: Delma Moore, designer


Project: Five Flower Sampler

Designer: Delma Moore

Type of Needlework: Brazilian Embroidery

Photos: 9 (so far)

Blackberry Lane website: http://www.blackberrylane.com.au/

Other Delma Moore design completed here.

Other Brazilian Embroidery projects completed here.

Comments: WORK IN PROGRESS

This is another project that I have started but not yet completed. The fun part is yet to be done, meaning the flowers. I really need to take some time in 2011 to finish this project.


(Photo showing the necessary threads for this project)


(A few leaves stitched)


(Close-up of the leaves)


(Another leave closeup)


(Leaves and some stems)


(Closeup)


(Another closeup)


(Photo showing what has been done at this point.
Flowers still need to be stitched as well as border)

Monday, November 15, 2010

The Thistle: Carole Lake, designer


Project: The Thistle

Designer: Carole Lake

Type of needlework: Needlepoint

Photos: 4

Carole's blog: http://www.carolelake.com/

Other projects that I have stitched from Carole here.

Comments: This is a little project that I wanted to stitch when I saw it.

The more diverse project I can stitch, the higher goes my learning curve. On this project, I especially like trying the turkey work. I had seen it many times before but never had the opportunity to work on a project that needed that stitch. It was fun to do and not difficult at all with Carole's excellent directions.

I also enjoyed stitching the border around the thistle. That was a new way of making one for me, so will keep that in mind the next time I am in need of one.

I have never done much free-form stitching either on canvas and stitching the leaves gave me a bit of practice. I can't say that I am completely comfortable with it but I guess the more I will do, the better I will get at it. I have no problem doing free-form on fabric but always find it a bit more difficult on canvas. For me, I find canvas limiting to some extent due to the holes, but perhaps I just need to get more experience with it by doing projects that call for special techniques.


(This is a frontal view of the finished ornament)


(Photo that came with Carole's project)


(Stitched Thistle before the finishing)

Friday, November 12, 2010

4-Way Bargello Orchid: Toni Gerdes, designer


UPDATE 04/24/2011:

I wanted to finish this project so that it would be practical, so I have used a 6" by 6" Sudberry House trivet for it.

Under the canvas I have added a piece of fabric of a color similar to the canvas itself because of all the unstitched areas.

Again, I am afraid that the photo is not too good because of the glass reflection.

===================================


(I am planning to go out shopping and see what
I can find that would look great in the middle of this design)

(The green leaves in the center came with the kit)


(This is the photo that came with Toni Gerdes project)


(3rd photo)


Project: 4-Way Bargello Orchid
Designer: Toni Gerdes
Type of needlework: Bargello

Photos: 6

ANG CyberPointers website: http://www.cyberpointers.org/


Comments: WORK IN PROGRESS

This is an absolutely lovely design that as member of ANG CyberPointers we received for free during our bimonthly meeting.
Toni was there in Cyberspace to help us along whenever we had questions
and she is still there even if the meeting is now over to answer our questions. Sometimes I wonder what we, stitchers, used to do before we started going online. We all used to stitch pretty much by ourselves without much communication with the other stitchers. Things sure have changed a lot since then and in this case for the better.

I started this project this past Thursday (November 4th) and I have already half of it completed. I just love these colors. I am using one of Toni's colorways, so can't get any credit for how well this is turning out to be. This is the Lavender/Green colorway.

This project can be done in 3 different sizes, mine will be the smallest size, which is 6" by 6". I thought that was a nice size as I don't always feel like ending up with big projects. Smaller also means that it takes less time to have a completed project.

In this project, there is one overdyed floss and all the rest of the threads are just Anchor floss of two different color families in different shades and 4 little plastic green leaves that will go in the middle where the dark lavender is located.

Now my big question is do I stop stitching after what has been done on the 5th photo which is the first photo above or do I continue stitching in order to do exactly as Toni Gerdes has done on her project (third photo above)?

The answer to that question is "I am not sure". If you have some opinions one way or another, I would love to hear from you. Please send me a little message at my email address here: LovetoStitch99@comcast.net .


(This is the 2nd photo showing the stitched center)


(This is the first photo taken of this project. I completed a pomegranate
motif as I wanted to see the progression of colors right away)

Monday, November 1, 2010

More Options in Hardanger: Dale Sokolow, designer


(Photo showing what has been completed so far in this project)


Project: More Options ... in hardanger
WORK IN PROGRESS

Designer: Dale Sokolow

Type of needlework: Hardanger

Photos: 10 so far

Another Dale hardanger project that I have stitched called "Options in Hardanger"

This is an EGA correspondence course: http://www.egausa.org/

Taken through EGA CyberStitchers: http://www.cyberstitchers.org/

Comments: The first project I have stitched from Dale was "Options in Hardanger" and when "More Options ...in hardanger came along, I decided to get on board this one too.

This piece of hardanger is done on #28 Plum Blossom Jobelan fabric using some Watercolours and Anchor #12 Pearl Cotton threads.

The size of the finished piece will be around 8" by 13 1/2".
I have already purchased my bell pull hardware for the finishing.

As you can see, most of it has been done. I still have to fill some diamond shapes, add another row of blanket stitch on top for the hardware to be enclosed in and I will be done.

While looking at the photos below I thought it was interesting to see the different color shades depending on the day's lighting. 


(1st photo taken showing upper and middle sections)

(2nd photo showing top, middle and bottom sections)


(Photo showing the beginning of outside border)


(Outside border completed)


(Photo showing the outside border added on the top and middle sections)


(Same thing but showing the bottom section)


(Photo showing additional work in upper section)


(Same thing but on bottom section)


(Work done on this project so far)